


We have retired this product to focus on our core products. We hope to bring it out of retirement someday.
The Shelter
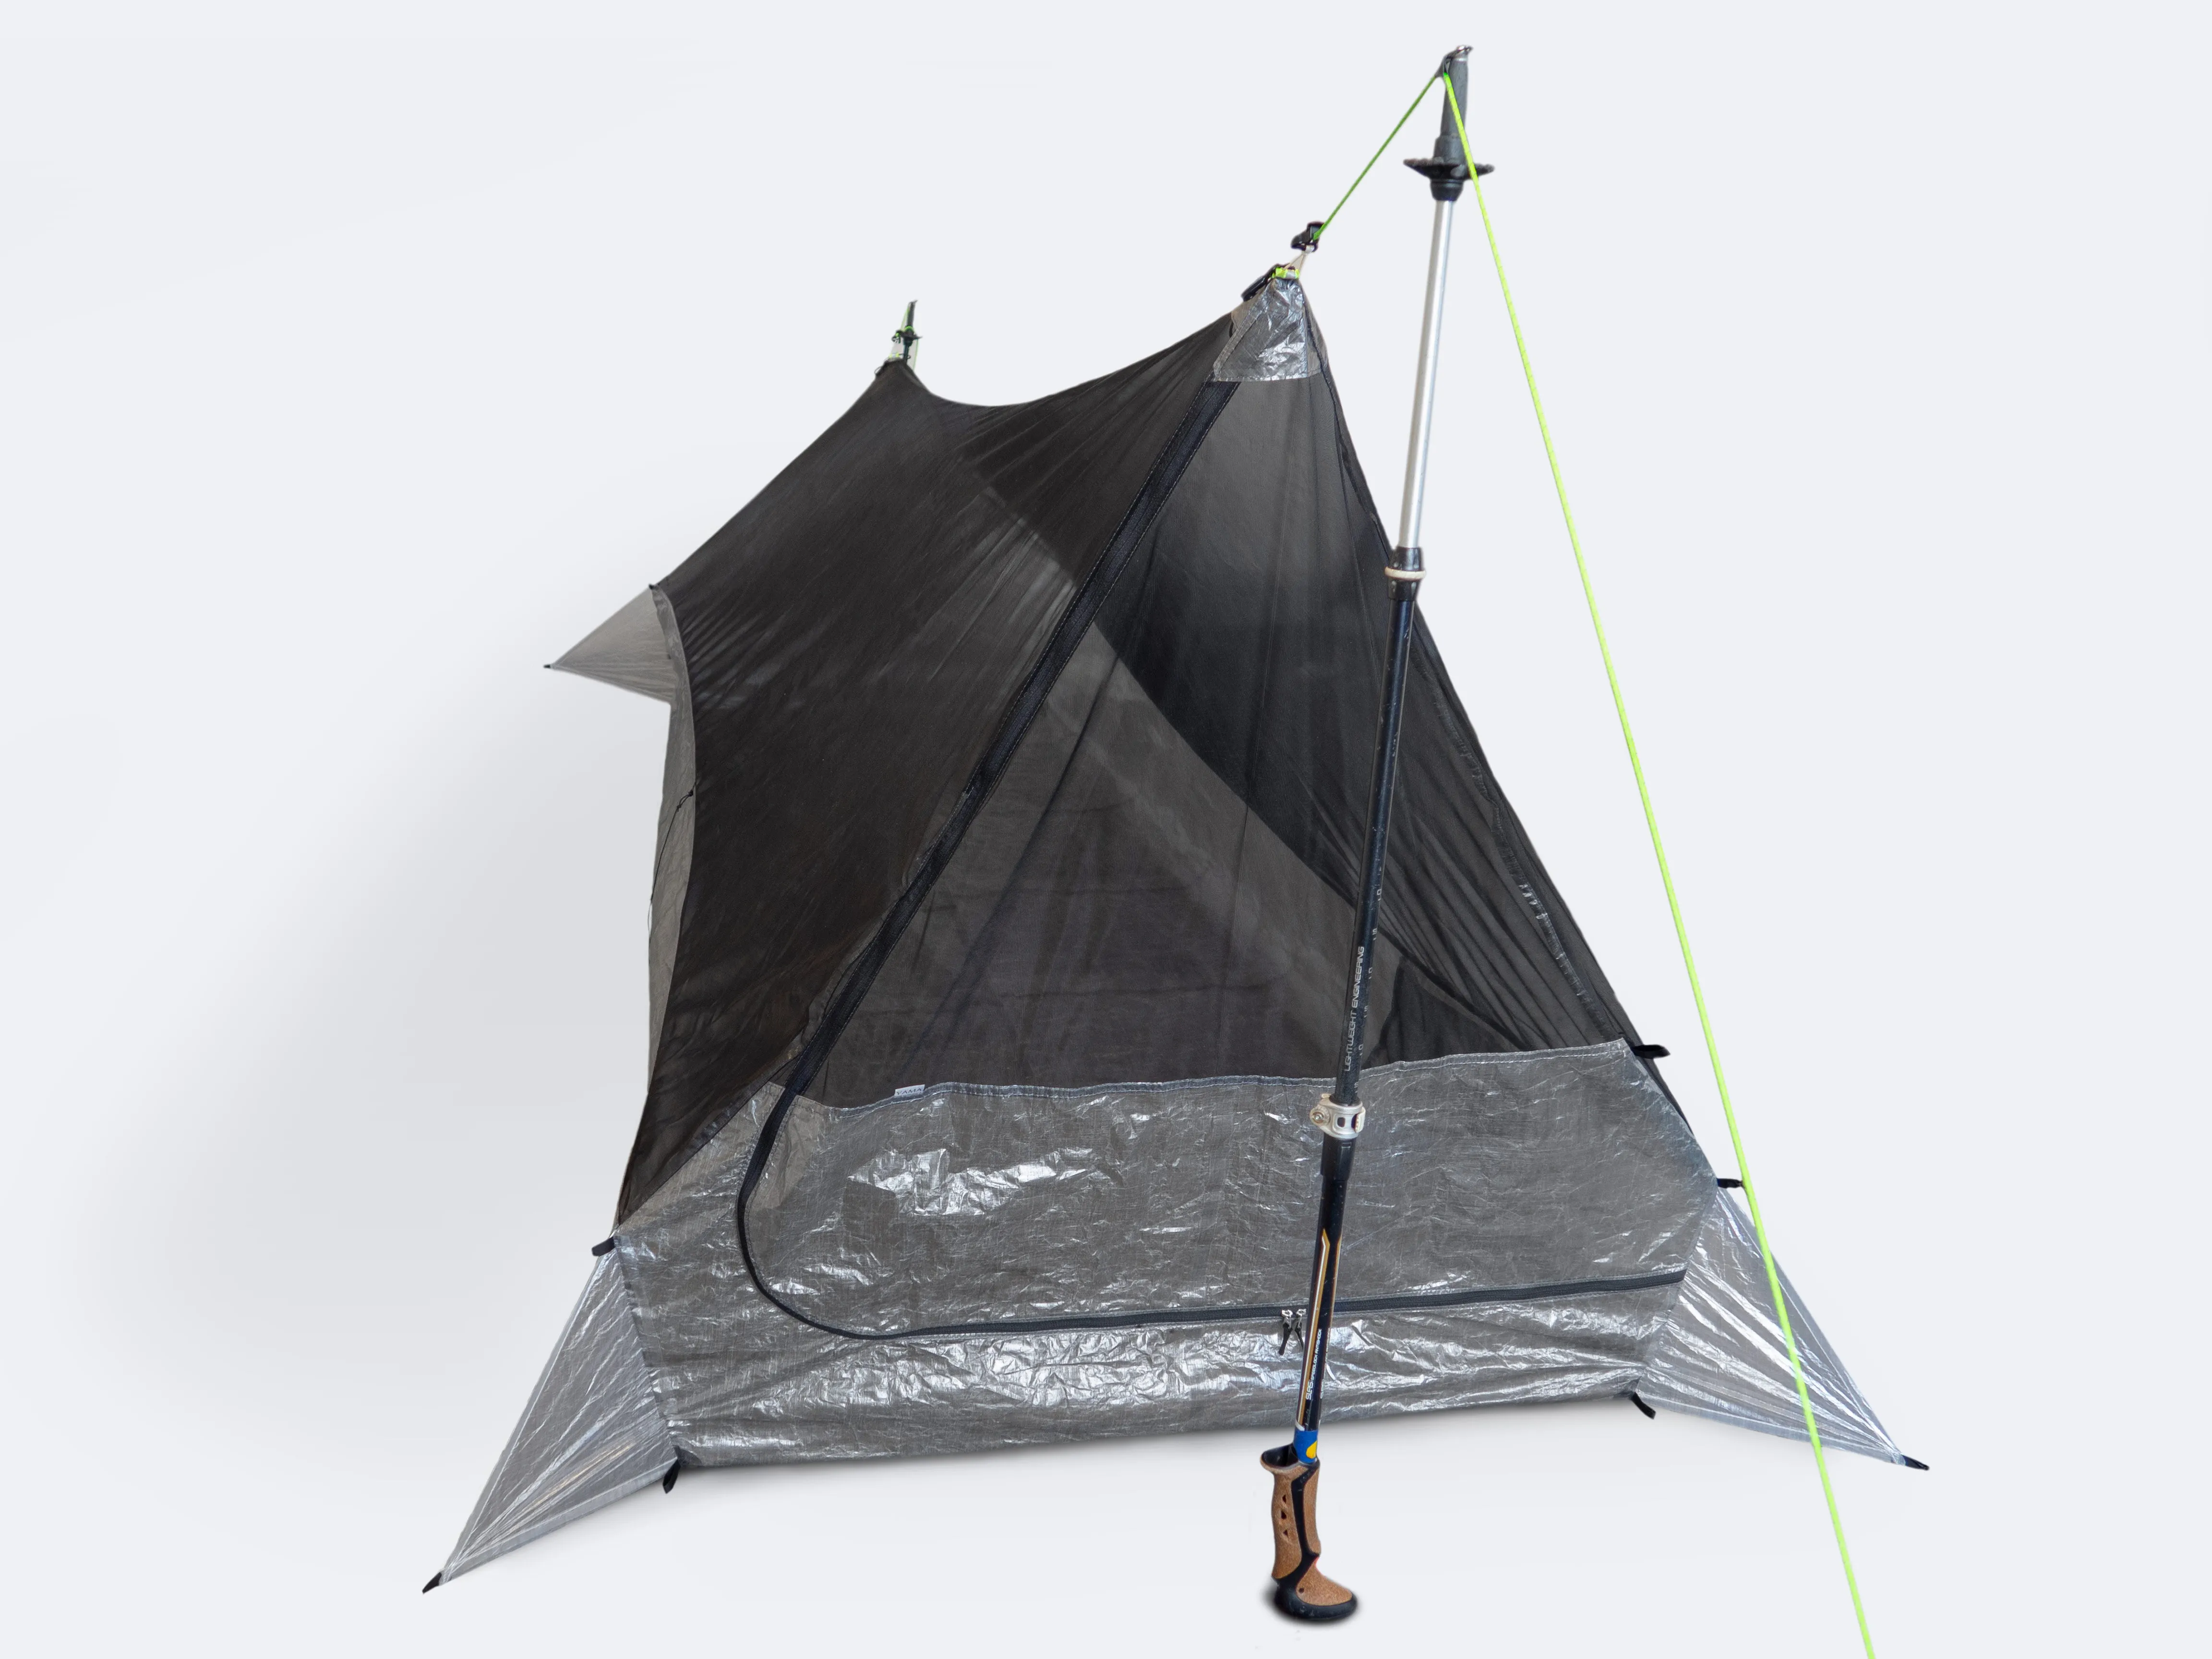
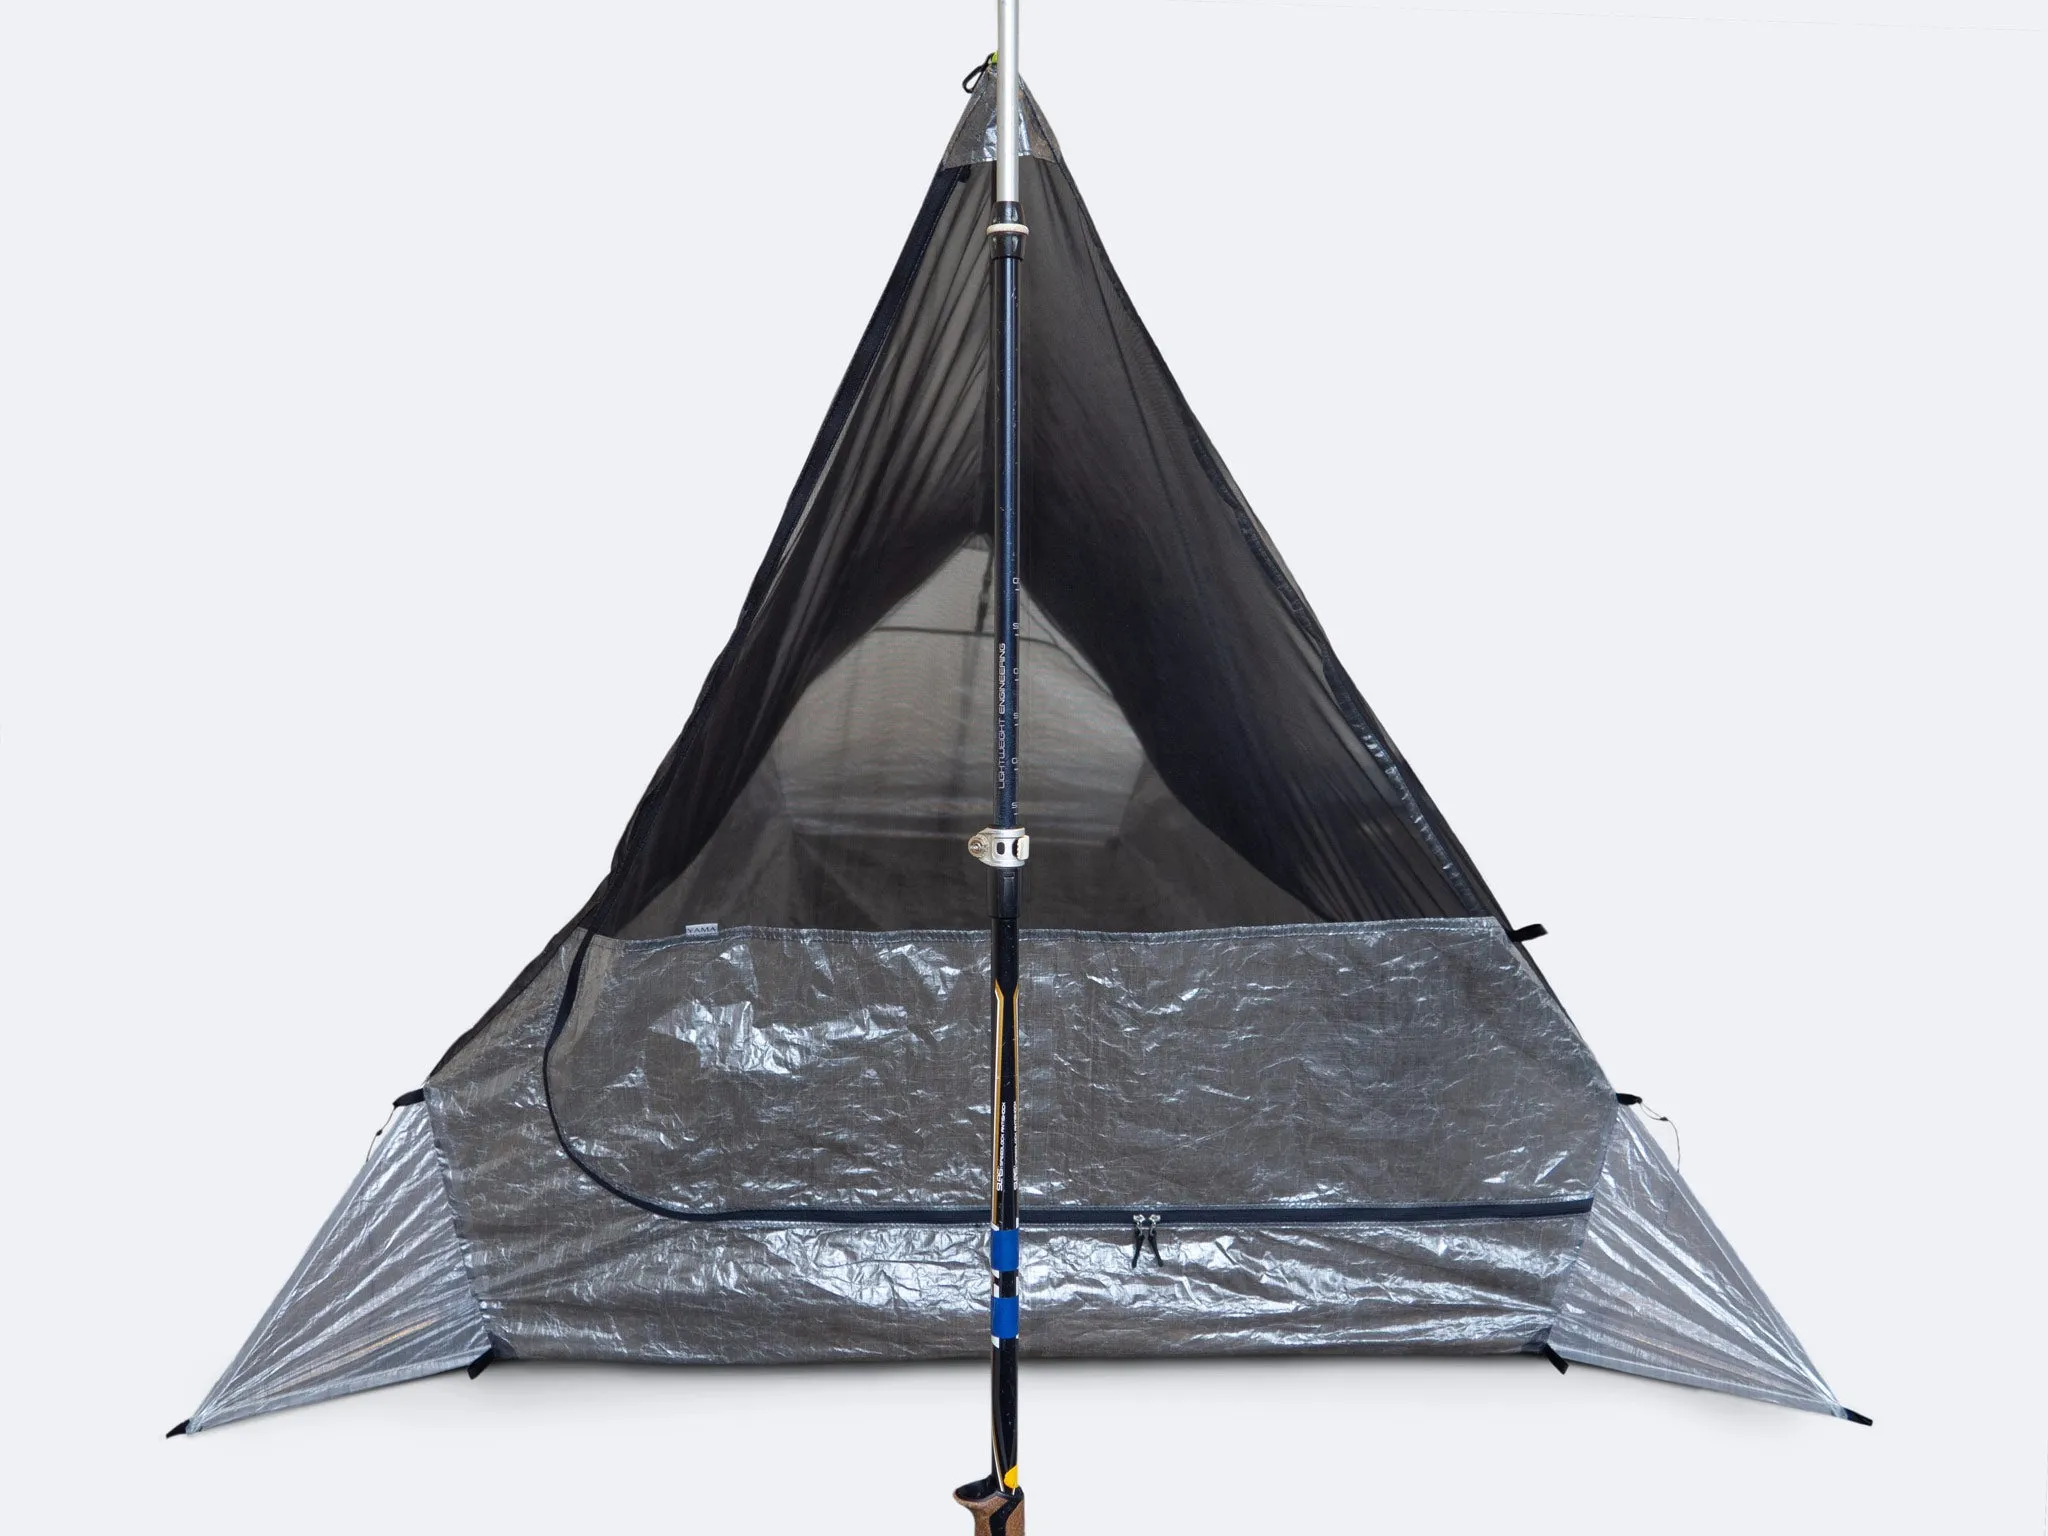
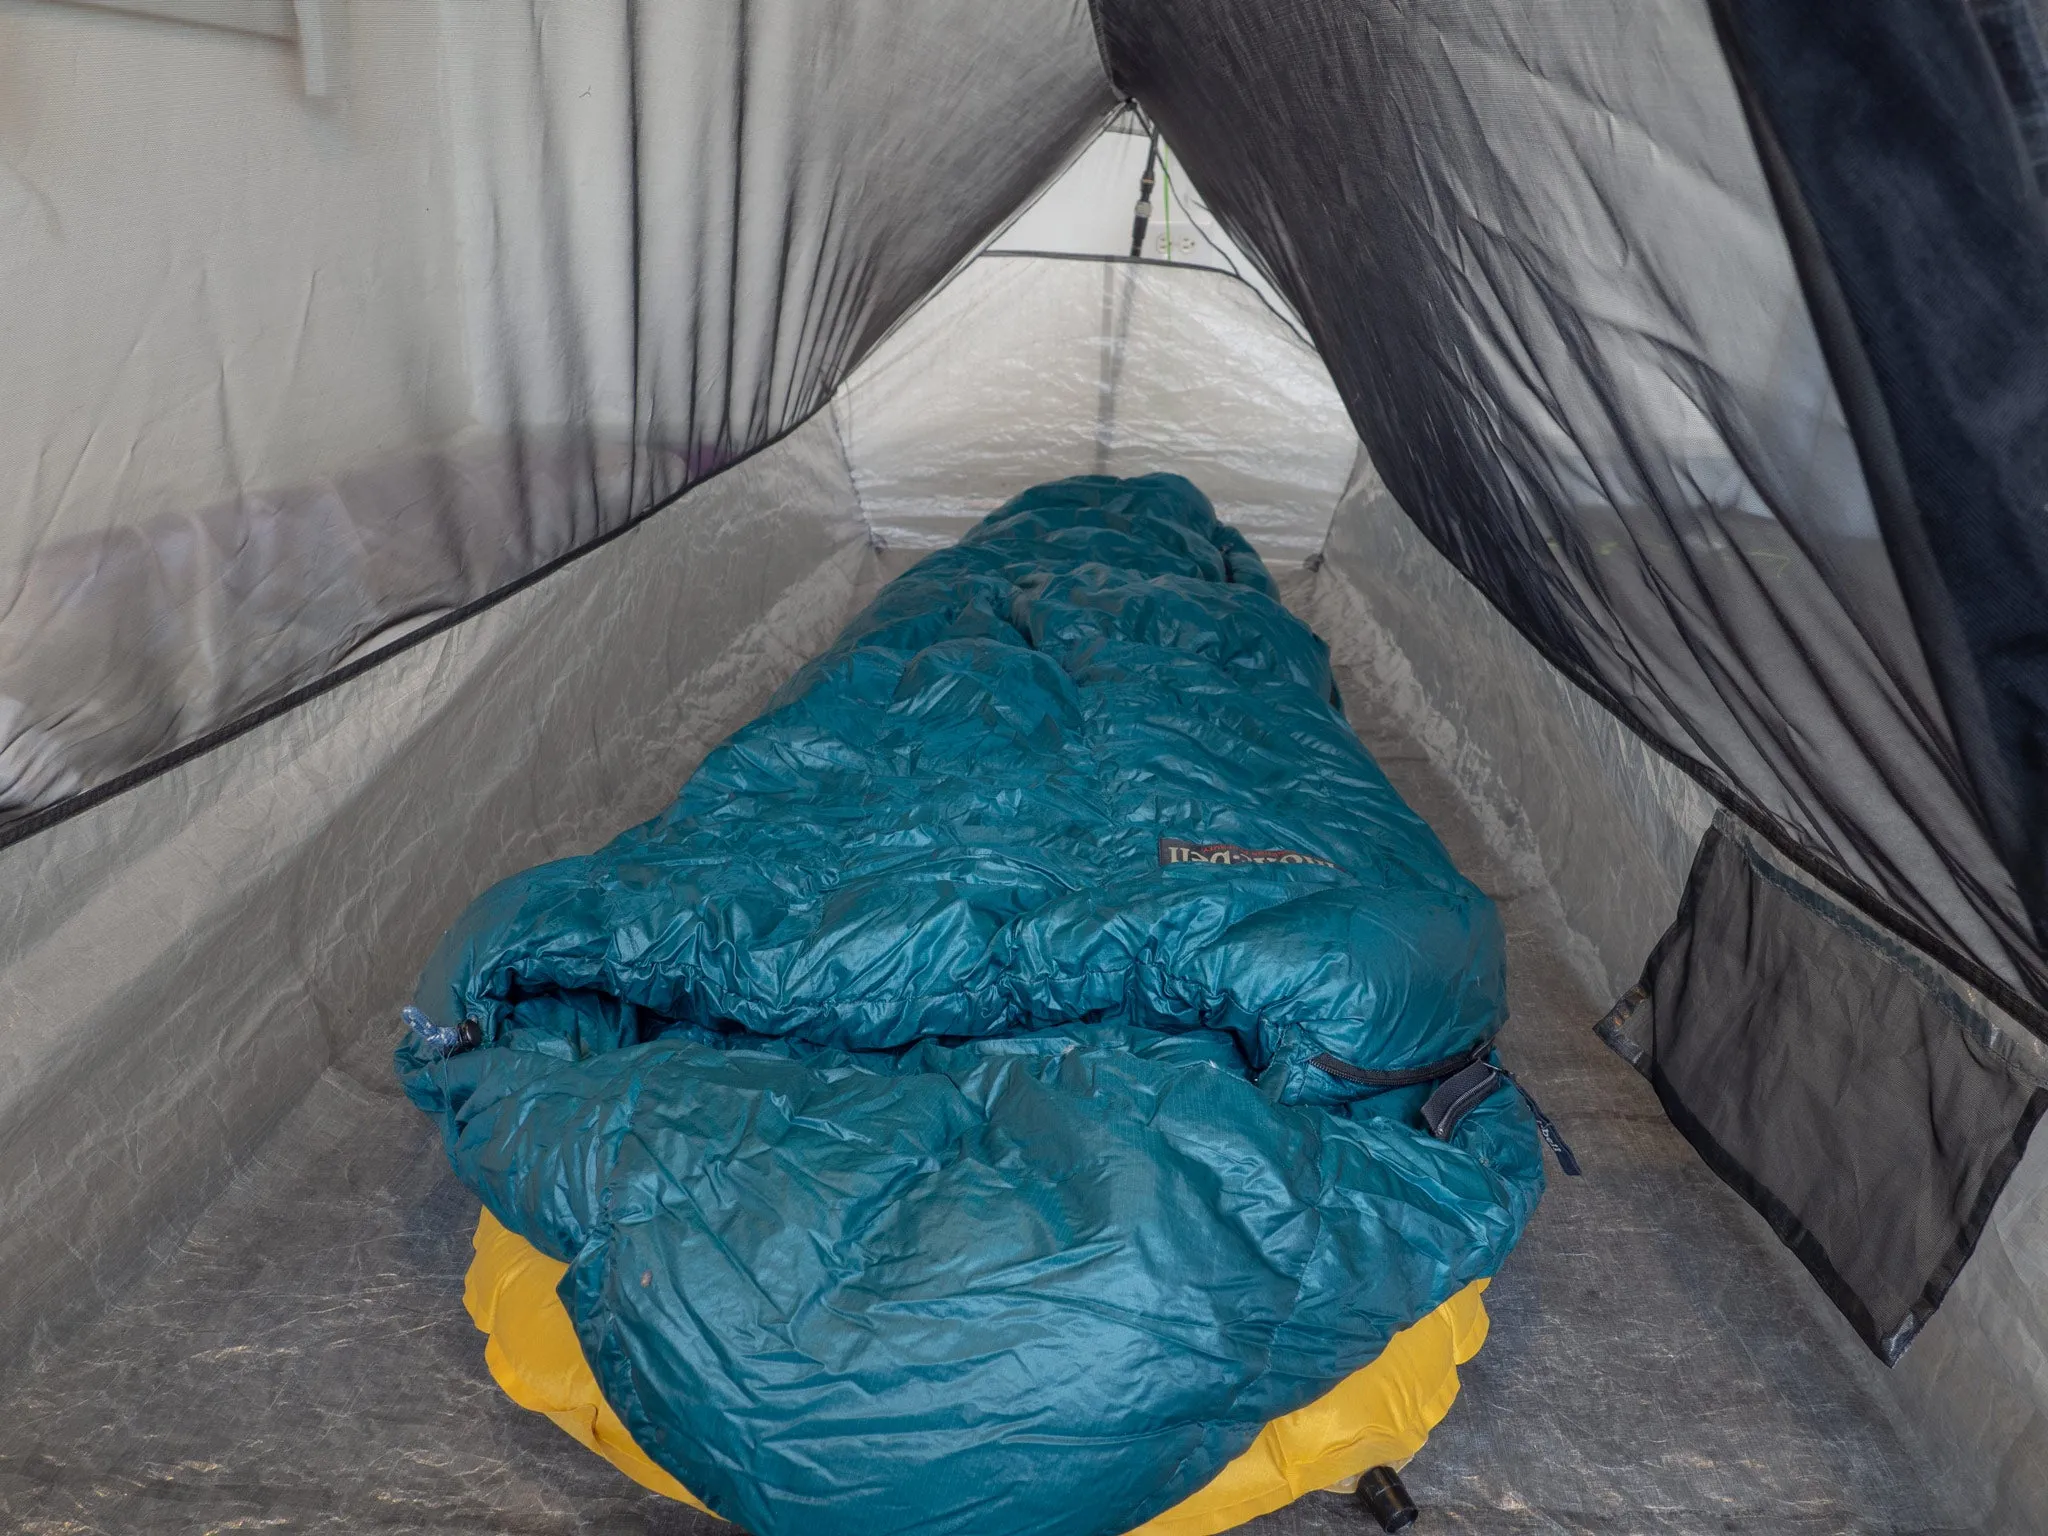
Don't let pesky bugs ruin your night. No-See-Um netting keeps out the smallest critters while the tub-floor blocks moisture from below. Deep, tapered walls improve the usable room inside while retaining a minimal footprint.
- Tapered tub-floor walls for extra elbow room.
- Deep, 10" tub-floor walls.
- Interior stash pocket and hang loop for your odds and ends.
- Taped DCF seams at corners of tub never need sealing.
- Lineloc tensioners at apexes for easy pitch adjustment (removable).
- UHMWPE Core guyline with reflective tracer included.
This net-tent pairs well with our Cirriform tarps and the 9'/7' x 9' tapered tarp. It will work with the 7'/5' x 9' tarp, though with minimal overhang.
The floor of this net-tent is made from 1 oz DCF. See more about material considerations, see our .
Proudly made in the USA.
Specifications
Packaged weight: 8.9 oz | 252g
Itemized weight:
- Shelter:
- Net-tent: 8.7 oz | 247g
- Stuff sack: 0.2 oz | 6g
- Total: 8.9 oz | 252g
- Rigging:
- 20' x 1/16" shockcord: 0.5 oz | 14g
- 3' x 3/32" shockcord: 0.1 oz | 3g
- 12 Mitten hooks: 0.4 oz | 11g
- 15' Guyline: 0.6 oz | 11g
- 2 Tensioners: 0.1 oz | 3g
- 2 Guyline grommets: 0.2 oz | 3g
- Total: 1.9 oz | 54g
- Note: Some rigging can be omitted or changed to reduce weight.
Materials:
- Floor: 1.0 oz DCF (CT2K.18)
- Netting: No-see-um
- Guyline: UHMWPE Core
Dimensions:
- Packed size: 8" x 5" x 4" | 20cm x 13cm x 10cm
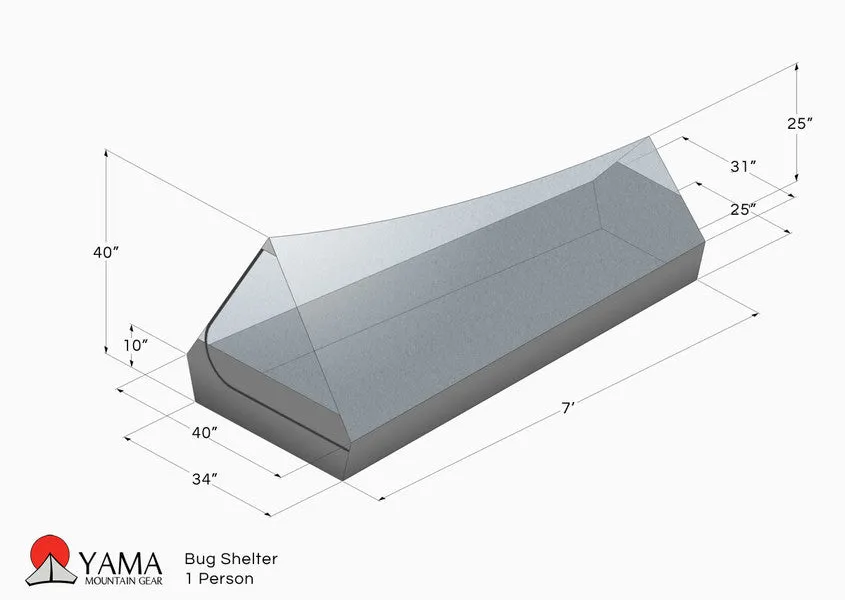
- Interior length: 84" | 213cm
- Interior height: 40" - 25" | 102cm - 64cm (head - foot)
- Interior width at ground level: 34" - 25" | 86cm - 64cm (head - foot)
- Interior width at top of tub: 40" - 31" | 102cm - 79cm (head - foot)
- Height of tub: 10" | 25cm
- Floor area: 17.2ft2 | 1.6m2
Required items:
- Trekking poles: 43" @ front, 29" @ rear (longer rear pole is ok)
- Stakes: 6 (none when pitched with a tarp)
- (Poles and stakes are not included.)
Rigging
Included items
Your net-tent comes with the following rigging included. The guyline and tensioners come pre-installed. The rest is left to you to cut and install to your individual needs.
Note: Partnering this with a Cirriform Tarp? Please see the bottom of the page for suggested cord lengths.
- 1/16" Shockcord: 20 ft | 6 m
- 3/32" Shockcord: 3 ft | 0.9 m
- Mitten hooks: 12
- Guyline: 15ft | 4.57m
- Guyline grommets: 2
- Lineloc tensioners: 2 (pre-installed)
Installation Process
There are no set rules, but at each location, we like to connect the net-tent to the tarp with a length of shock cord and a mitten hook.
- At one end of the cord, tie a loop. We like to use a simple overhand loop knot.
- At the other end of the cord, tie on a mitten hook. We like to use a clinch knot.
- At the end with the loop, attach it to the webbing loop on the net-tent using a girth hitch. To do this, pass the loop part way through the webbing loop, then pass the mitten hook through the side of the loop poking through the webbing. Pull the mitten hook end to tighten everything up.
Locations/Descriptions
It's not necessary to install cords at all locations, but with more locations secured, the better the net-tent will keep its intended shape (especially in lower pitches), and the less it will move around in wind.
- Peaks (2): If the distance between the tarp and net-tent remains fairly consistent night to night, we like to connect the net-tent peak to the tarp using the 3/32" shockcord. If your tarp pitch is not consistent, for example if you sometimes pitch your tarp at different heights, you might be better off tying a mitten hook to the end of the guyline installed at the peak and adjusting the length using the tensioner.
- Bottom of tub (4): We like to secure the bottom corners of the tub using a length of 1/16" shock cord and mitten hook to connect the the tips of the triangles (at the tub's corners) to the stakes used to secure the tarp's corners. We either clip the mitten hook to the end of the tarp's guyline at the stake, or to shorten it, wrap the shockcord around the stake and clip it back to the floor or some other location. Alternatively, you might use some minimal stakes to secure the bottom of the tub. Stakes might be a better route if your setup would require excessively long connections, is not an a-frame setup, or if you're in a really windy environment. You can also forego securement entirely if you clip out the top of the tub as described below.
- Top of tub (4): Securing the top corners of the tub is optional if you're securing the bottom (see above) and may not work with all setups. When using them, we'll connect them via shockcord and a mitten hook to the tarp's corner tie-outs. For low pitches, when the net-tent can't be pitched to its full height, tensioning the top of the tub and letting the rest drape helps the tub retain function. For very low pitches with the Cirriform Tarp, run the cord through the loop on the tarp's associated seam before clipping it to the tarp's tie-out.
- Midpoints on tub's edges (2): Optional. Using these locations will improve security in wind. To use, connect them to associated locations on an a-frame tarp with the 1/16" shockcord and mitten hooks.
Pitching with the Cirriform Tarp?
If you plan to partner your net-tent with our 1P or 2P Cirriform Tarp, we suggest cutting your cords to the lengths outlined below.
1P Cirriform Tarp
- Front peak: As short as possible
- Rear peak: ~7" | 18 cm
- Top of tub at front: 14" | 36 cm
- Top of tub at rear: 12" | 30 cm
- Bottom of tub at front: 21" | 53 cm
- Bottom of tub at rear: 18" | 46 cm
- Midponts on edge of tub: 12" | 30 cm
2P Cirriform Tarp
- Front peak: As short as possible
- Rear peak: ~10" | 25 cm
- Top of tub at front: 18" | 46 cm
- Top of tub at rear: 16" | 41 cm
- Bottom of tub at front: 23" | 58 cm
- Bottom of tub at rear: 20" | 51 cm
- Midponts on edge of tub: 14" | 36 cm
 Belt 3D Printer")


